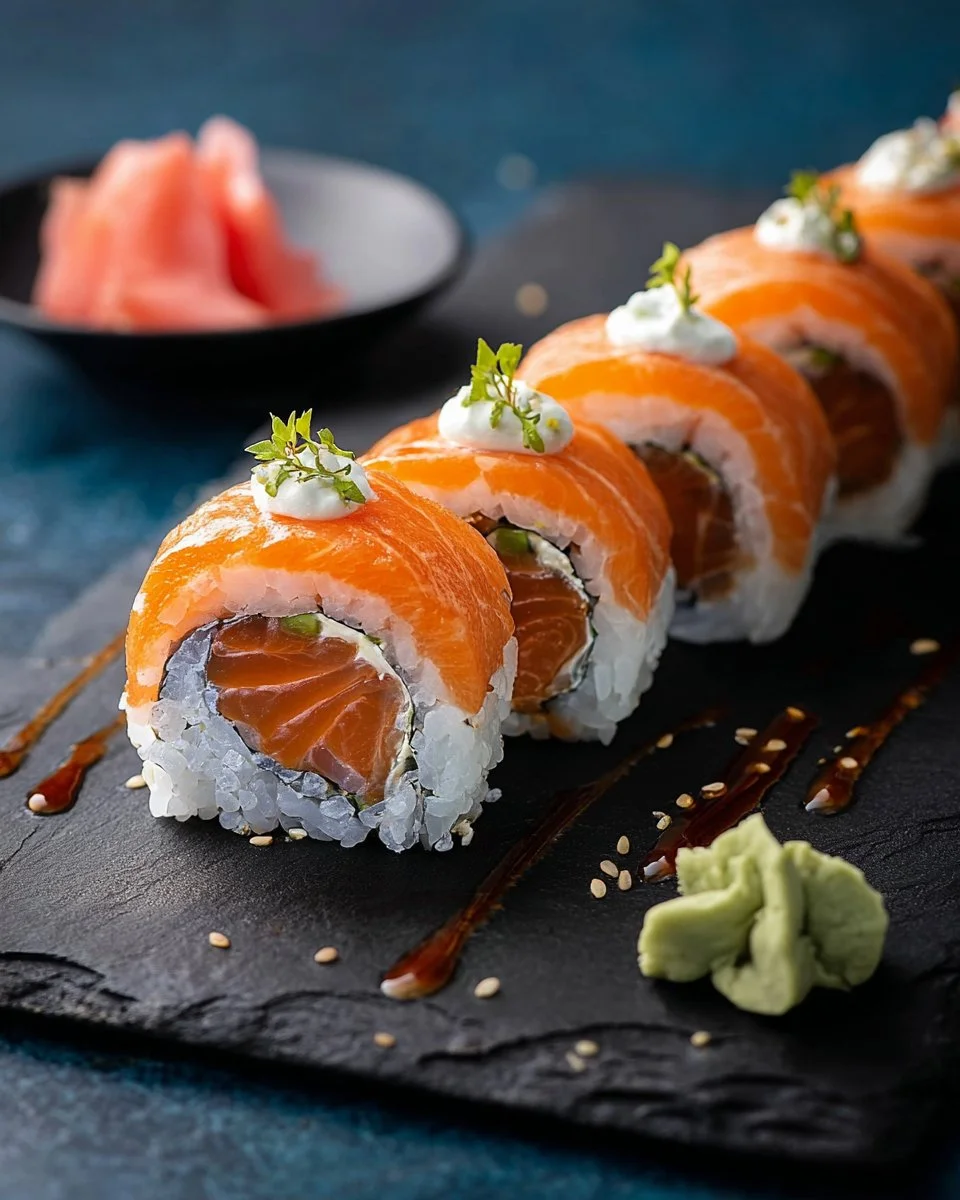
There’s something truly special about the first bite of an Alaska Roll. The combination of the silky, fresh sushi-grade salmon and the creamy avocado creates a fabulous, melt-in-your-mouth experience. Every roll is beautifully vibrant, showcasing relaxed hues of pink and green wrapped snugly in a sheet of nori. Honestly, it’s a staple in my kitchen whenever I want to impress guests or simply indulge in some delicious flavors after a long week.
Making an Alaska Roll comes together surprisingly fast, which means there’s no need for complicated planning or long hours in the kitchen. Whether it’s for an intimate dinner or a fun gathering with friends, these rolls fit perfectly into any occasion. And don’t worry — if you happen to have leftovers, they’ll keep their delicious charm for a few days!
Why I Love Alaska Roll
Alaska Roll Recipe
I absolutely adore this Alaska Roll recipe! It hits that sweet spot where ease meets decadence, making it incredibly easy and undeniably delicious. The vibrant colors and fresh ingredients feel so festive, and they elevate any meal into something special. With countless flavor profiles packed into every roll, it’s a true winner at my table, delighting both sushi novices and aficionados alike!
Alaska Roll Ingredients
The magic of this Alaska Roll truly lies in the harmony of fresh, high-quality ingredients that come together to create explosion of flavor. Don’t worry about exact measurements just yet; those are all in the recipe card for you!
Essential Components
- 1½ CUPS SUSHI RICE: These little gems pack a mighty punch of texture and flavor, forming the delightful base of each roll.
- 2 CUPS WATER: The essential element for cooking the rice to perfection.
- 3 TBSP RICE VINEGAR: Adds a tangy kick that brightens the roll wonderfully.
- 1 TBSP SUGAR: This balances the vinegar’s tartness and gives the rice a touch of sweetness.
- ½ TSP SALT: Enhances all the other flavors, making every bite irresistible.
- 4 SHEETS NORI: The vessel for your ingredients, offering a slightly chewy texture against the tender rice.
- 4 OZ FRESH SUSHI-GRADE SALMON (THINLY SLICED): The star of the show! It’s luscious and buttery, providing that fresh taste.
- ½ AVOCADO (SLICED): Brings in an element of creaminess that contrasts beautifully with the fish.
- ¼ CUCUMBER (JULIENNED): Adds a crunchy, refreshing element, enhancing the overall composition.
- 1 TSP SESAME SEEDS (OPTIONAL): These give an extra nutty flavor and a delightful crunch on top.
Substitutions and Tips
Need a swap? If you’re looking to shake things up, here are some great substitutions:
- Sushi Rice can be replaced with short-grain rice if you’re in a pinch, but the texture won’t be quite the same.
- Sushi-grade salmon can often be switched for tuna if preferred or even cooked shrimp for a different flavor profile.
- For a twist, try adding spicy mayonnaise for a little heat or a dash of cilantro for a refreshing note.
- Keep in mind, if you use larger pieces of fish, you may want to adjust the rolling technique a bit to accommodate.
Kitchen Tools You’ll Need
- Bamboo sushi mat: Perfect for rolling your sushi tightly.
- Sharp knife: Essential for cutting your rolls cleanly.
- Medium saucepan: For cooking the rice.
- Measuring cups and spoons: To get your portions just right.
- Rice cooker (optional): Takes the guesswork out of cooking rice.
- Cutting board: A must-have for prep work.
How to Make Alaska Roll
Let’s dive into creating this vibrant Alaska Roll. I’ve broken down the process into simple steps. Follow along, and you’ll have a delicious meal in no time. We’re aiming for perfectly rolled, fresh sushi that bursts with flavor at every bite.
Rinse and Prep the Rice
First, start by rinsing the sushi rice under cold water until the water runs clear. This step is key as it removes excess starch that can make your rice too sticky. Once rinsed, add the rice to a saucepan with the 2 cups of water and bring to a boil over medium heat.
Cook to Perfection
Next, once boiling, reduce the heat to low, cover, and let it simmer for about 15 minutes. You want to ensure that all the water is absorbed, resulting in tender rice that’s not mushy. Once cooked, remove from heat and let it sit for another 10 minutes with the lid on to ensure a fluffy outcome.
Season Your Rice
Now, in a small bowl, mix together the rice vinegar, sugar, and salt until the sugar dissolves. Gently fold this mixture into the warm rice, being sure not to mash the grains. Let the rice cool to room temperature while you prepare the other ingredients.
Set Up Your Rolling Station
Once your rice is cool, lay a sheet of nori on your bamboo sushi mat. Make sure the shiny side is facing down — this will be the exterior of your roll. This presentation is key, and you want it to look cute too!
Spread the Rice Evenly
Next, grab a handful of cooled sushi rice (about a cup) and spread it thinly over the nori, leaving a 1-inch border at the top. You want this layer to be even but not too thick; a thin layer allows for easier rolling. This step creates a necessary foundation for your fillings.
Layer on the Filling
Now, flip the nori so the rice is face down. Place a couple of slices of salmon, a few pieces of avocado, and some julienned cucumber right in the center. Make sure not to overstuff, as this will make rolling difficult and could lead to a mess! Keep it simple and neat.
Roll It Up Tight
Once you’ve added the fillings, lift the bamboo mat and start rolling it away from you, tucking in the fillings tightly as you go. The goal here is to roll firmly without squeezing too hard to squish out the ingredients. Make sure the edges touch before sealing the roll.
Seal and Slice Your Roll
Next, moisten the top edge of the nori with a little water to seal your roll shut. This helps hold everything together. With a sharp knife, slice your roll into 8 equal pieces, wiping the knife with a damp cloth between cuts to ensure smooth slices without tearing the nori.
Finish with a Sprinkle
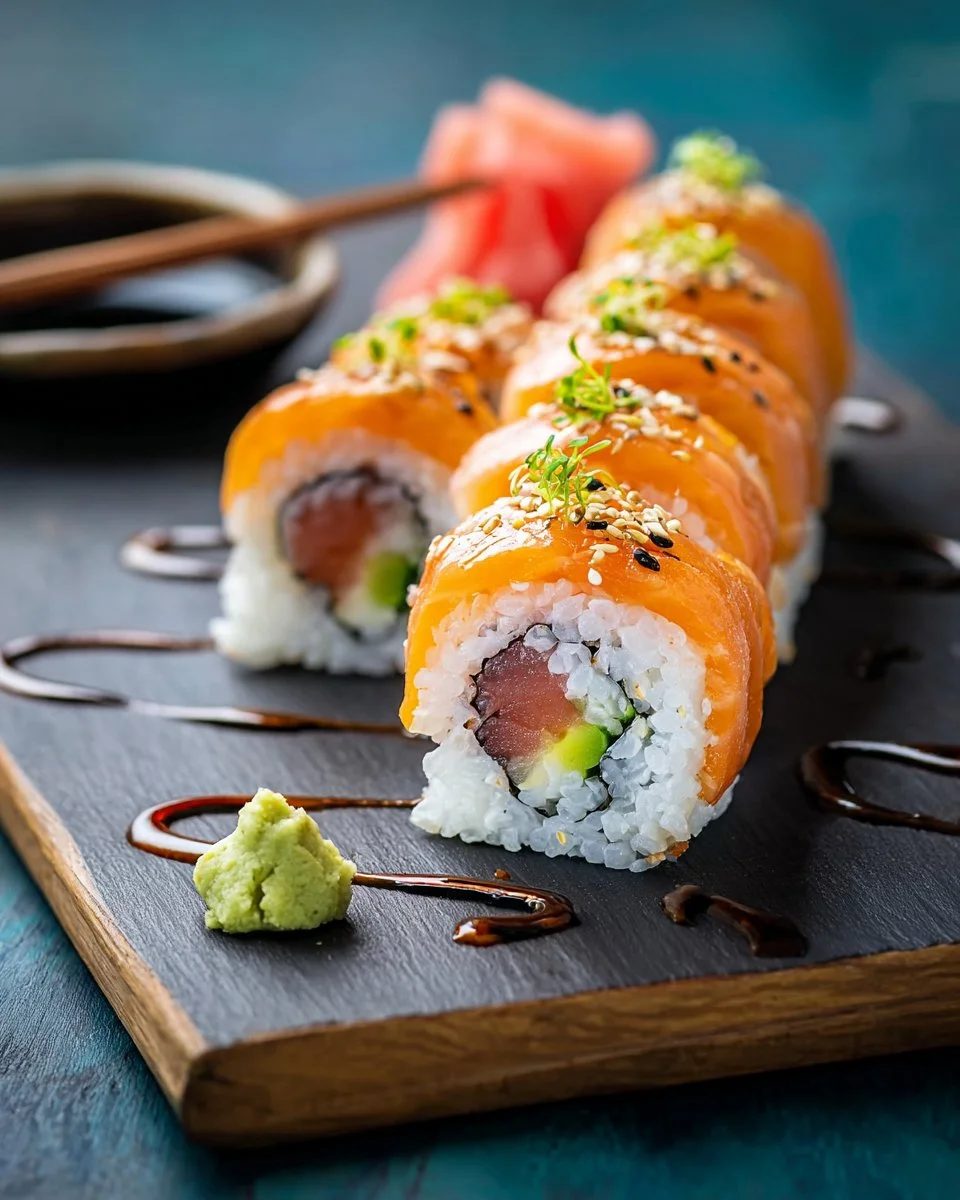
Finally, if you’re feeling fancy, sprinkle a few sesame seeds on top of the sliced rolls for a delightful crunch and nutty flavor. This little touch elevates their elegance, making them look as good as they taste!
How to Store Alaska Roll
If you find yourself with leftovers (which is rare!), you’re in luck! These rolls stay fresh in the refrigerator for about 3-4 days when stored in an airtight container. It’s best to enjoy them cold, but if you prefer warm, you can give them a few seconds in the microwave (though they may not be quite as delicious). I recommend consuming them sooner rather than later for maximum freshness!
Tips for Success
- Use only high-quality, fresh fish to ensure the best taste and safety.
- Keep your hands wet while working with the rice; this prevents it from sticking to your fingers.
- Don’t pack the fillings too tightly; remember, you’re rolling, not creating a sushi burrito!
- Pay attention to sharpness — a good knife is essential for clean slices.
- If you’re new to rolling, practice will make you a pro in no time!
Serving Suggestions
- Serve with soy sauce, pickled ginger, and wasabi for an authentic experience.
- Pair with a light cucumber and seaweed salad for a refreshing side dish.
- Try a chilled sake or green tea to elevate the meal.
- For garnish, add some microgreens or a sprinkle of toasted sesame seeds for that extra flair.
- Arrange the rolls on a colorful platter for a stunning presentation that will impress your guests.
Your Alaska Rolls are ready to shine at the table, making every dining experience a celebration! Enjoy sharing this delightful dish with friends and family, or simply savor it all by yourself. Happy rolling!