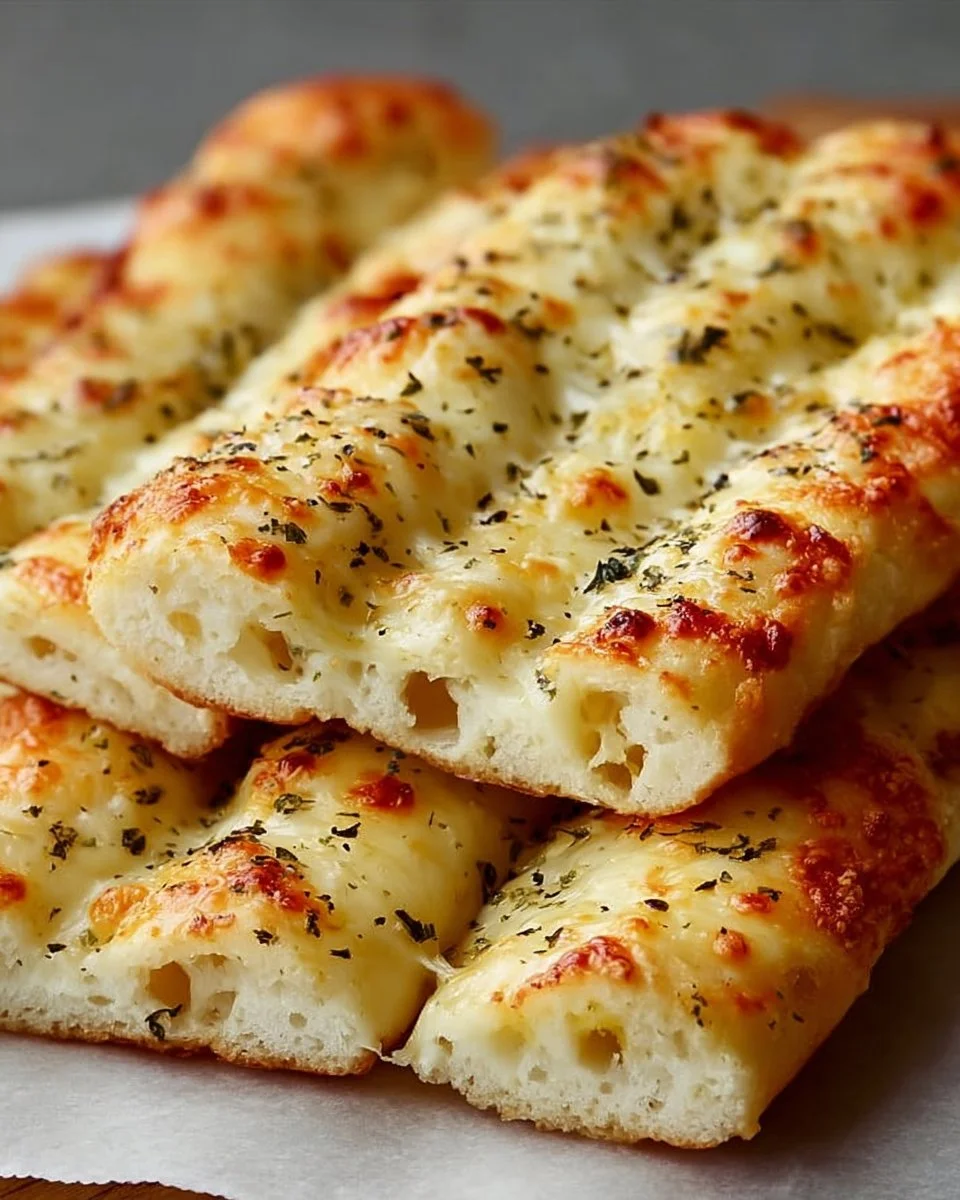
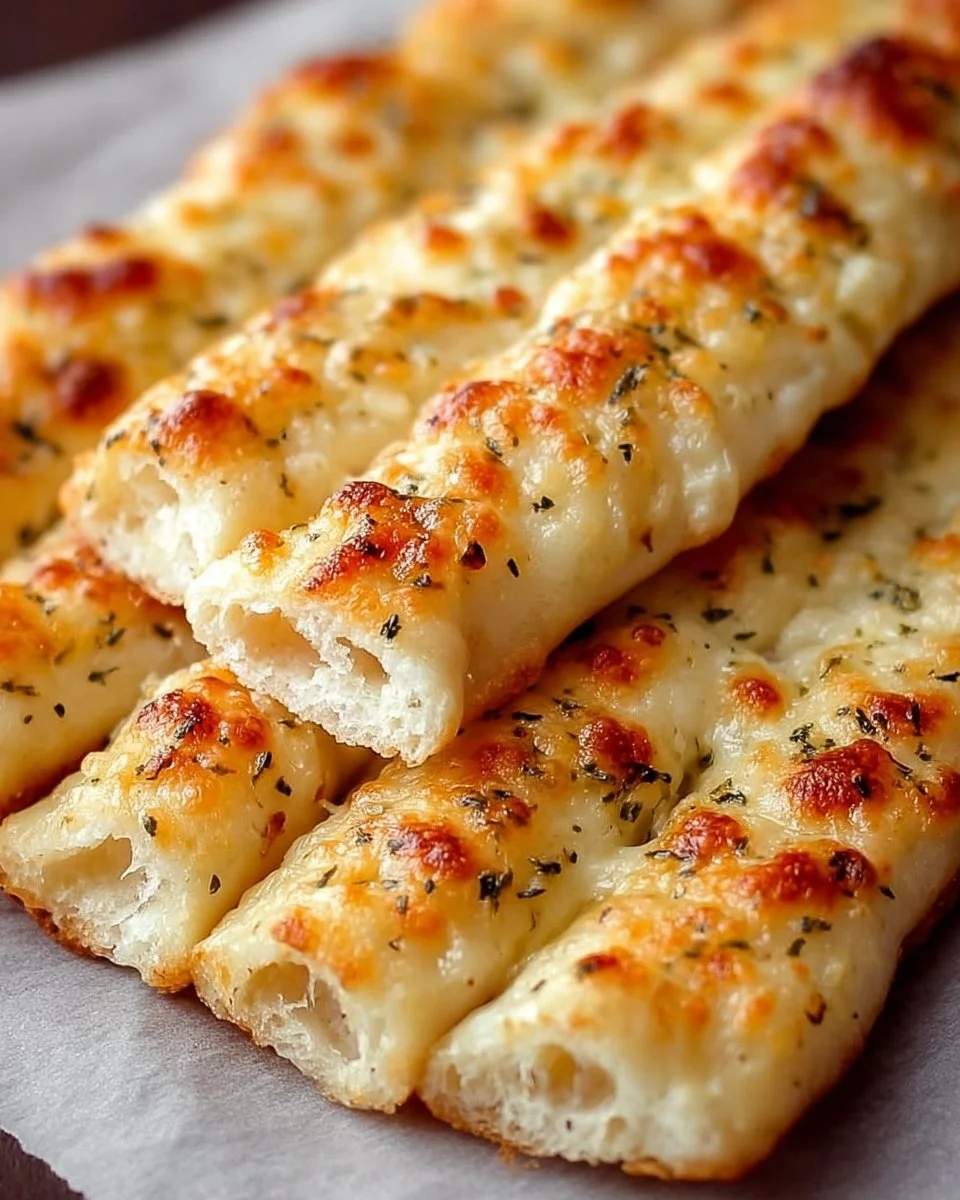
There’s something truly special about the aroma of freshly baked bread filling the kitchen. These Homemade Cheesy Breadsticks are wonderfully indulgent, with their crispy exterior giving way to a gooey, cheesy center that’s just begging to be pulled apart. The delightful combination of mozzarella and Parmesan cheeses makes every bite a comforting experience. I love whipping these up for family movie nights or casual get-togethers with friends, and they always bring smiles all around!
The beauty of these breadsticks is that they come together surprisingly fast—so you can make them even on busy weeknights. They’re perfect as a side for pasta dishes or enjoyed on their own, perhaps with a side of marinara for dunking (because what’s better than that?). And if you find yourself with leftovers, don’t worry! These breadsticks keep well and can be enjoyed the next day, too.
Why I Love Homemade Cheesy Breadsticks
Homemade Cheesy Breadsticks have a special place at my table. They hit that sweet spot between being incredibly easy and undeniably delicious, striking the perfect balance of flavors with just a handful of ingredients. Whether you’re serving them at a gathering or enjoying them with a cozy meal at home, they elevate any occasion with their warmth and cheesy goodness. They’re a true winner in my kitchen!
Homemade Cheesy Breadsticks Ingredients
The magic of this recipe truly lies in the harmonious blend of ingredients. Each one plays a vital role in achieving that perfect breadstick we all crave. Don’t worry about exact measurements just yet; those are all in the recipe card for you!
Essential Components
- 2 Cups ALL-PURPOSE FLOUR: This forms the backbone of our breadsticks, giving them structure and chew.
- 1 Packet (2 1/4 tsp) ACTIVE DRY YEAST: The yeast helps our dough rise and become fluffy.
- 1 tsp SUGAR: Just a pinch to feed the yeast and enhance flavor.
- 1 tsp SALT: Essential for balancing the flavors.
- 3/4 Cup WARM WATER: Activates the yeast and creates the dough’s base.
- 1 Cup SHREDDED MOZZARELLA CHEESE: The star ingredient that brings ooziness and cheesiness.
- 1/4 Cup GRATED PARMESAN CHEESE: Adds a nutty depth and extra flavor.
- 2 tbsp BUTTER: For brushing on top when they come out of the oven, adding richness.
- 2 CLOVES GARLIC, MINCED: Infuses that irresistible garlic aroma into the breadsticks.
- 1 tsp DRIED ITALIAN HERBS: A flavorful blend that gives an extra aromatic kick.
Need a swap?
Want to switch things up? If you don’t have certain ingredients on hand, here are a few easy substitutions:
- Flour: Whole wheat flour can be used for a nuttier flavor, but your breadsticks will be denser.
- Cheese: Use cheddar or even pepper jack for a zesty twist! Just keep an eye on the melting point.
- Butter: Olive oil serves well if you want a lighter touch (though it won’t be quite as rich).
- Herbs: Fresh herbs like basil or oregano can elevate the flavor further—just double the amount as fresh herbs are milder.
Feel free to experiment! Baking is all about creativity. This dough is quite forgiving, so enjoy the process!
Kitchen Tools You’ll Need
- Mixing bowl (large)
- Measuring cups and spoons
- Baking sheet (rimmed)
- Rolling pin
- Pastry brush
- Clean kitchen towel (to cover the dough)
Let’s Dive into Creating These Cheesy Breadsticks
Let’s dive into creating this delightful Homemade Cheesy Breadsticks. I’ve broken down the process into simple steps. Follow along, and you’ll have a delicious meal in no time. We’re aiming for warm, cheesy perfection!
Activate the Yeast
In a bowl, mix the warm water, sugar, and yeast. Allow it to sit for about 5 minutes until it becomes foamy. This step is key to ensuring that your dough rises nicely!
Combine the Dry Ingredients
In a separate bowl, combine the flour and salt. Once they’re well mixed, add the yeast mixture and knead until the dough is smooth and elastic—about 5-7 minutes. You want a lovely, supple dough that’s not too sticky.
Let It Rise
Place your dough in a warm spot and cover it with a clean kitchen towel. Allow it to rise for about 1 hour, or until it has doubled in size. While you’re waiting, take a moment to imagine how delicious these breadsticks will be!
Preheat and Prepare
Go ahead and preheat your oven to 425°F (220°C). This way, the oven will be hot and ready for your cheesy goodness!
Roll Out the Dough
Once your dough has risen, turn it out onto a lightly floured surface and roll it into a rectangle. Aim for about a 1/2-inch thickness to ensure a great balance of tenderness and crispiness.
Fold in the Cheese
Now it’s time for the magic part! Sprinkle the mozzarella and Parmesan cheeses over the rolled dough. Fold the dough over a few times to incorporate all those cheesy layers. Trust me; this is where the flavor lives!
Cut and Place
Using a sharp knife or pizza cutter, cut the dough into strips and transfer them to a baking sheet lined with parchment paper. Give them a little space since they’ll puff up as they bake.
Brush with Garlic Butter
In a small bowl, melt the butter and mix it with the minced garlic and Italian herbs. Brush this luscious mixture over the dough strips generously. It adds a beautiful flavor and golden finish.
Bake Until Golden
Pop the baking sheet in the oven and bake for 12-15 minutes, or until the breadsticks are golden brown and delightful. Your kitchen will smell heavenly at this point—just wait!
Serve Warm
Once they’re out of the oven, let them cool slightly before serving. Enjoy warm for the best cheesy experience!
How to Store Homemade Cheesy Breadsticks
Leftovers are just as good! Allow your breadsticks to cool and store them in an airtight container at room temperature for up to 2 days. If you have more, you can store them in the refrigerator for about 3-4 days. For longer storage, freeze them for up to 2-3 months—thaw them overnight in the fridge when you’re ready to enjoy again. Reheat in the oven to restore that delightful crunch!
Tips for Success
- Use fresh yeast for the best rise and flavor.
- Don’t skip the resting time. It helps develop the gluten for better texture.
- Ensure your water isn’t too hot when activating the yeast—it should feel warm to the touch, not hot!
- Be generous with the garlic butter—it makes a significant difference in taste.
Serving Suggestions
- Serve with marinara sauce for a delightful dipping experience.
- Pair with a fresh salad for a well-rounded meal.
- Best enjoyed with warm soups or pasta dishes.
- Garnish with a sprinkle of fresh parsley for a pop of color.
- Serve alongside a glass of chilled white wine for a lovely treat!
Enjoy making these Homemade Cheesy Breadsticks! I can’t wait for you to savor this delightful recipe just as much as I do. Happy baking!