There’s something truly special about making Onigiri, or Japanese rice balls. The way they come together is both a comforting and delightful experience; often, I feel like I’m bringing a little piece of Japan into my home kitchen. Each bite is a harmonious blend of tender rice, savory furikake, and a hint of umami from the nori. These little beauties are perfect for sharing, packing in lunchboxes, or enjoying as a snack. I often make them for weekend picnics or cozy evenings at home, and they never fail to bring a smile to my face!
Incredibly versatile, Onigiri comes together surprisingly fast. Whether you’re prepping them for a busy weeknight dinner or serving them at a gathering, they bring a sense of whimsical charm that everyone appreciates. Plus, if you have any leftovers (which is rare!), they make for a tasty grab-and-go breakfast option the next day.
Why I Love Onigiri Japanese Rice Balls
There’s something wonderfully comforting about Onigiri Japanese Rice Balls. They hit that sweet spot of being incredibly easy to make and undeniably delicious. The simple flavors combined with the satisfying texture of the rice make it a true winner at my table. Plus, you can get creative with fillings and toppings—there’s always room for innovation!
Onigiri Japanese Rice Balls Ingredients
The magic of this Onigiri truly lies in its harmony of flavors and textures. Don’t worry about exact measurements just yet; those are all in the recipe card for you!
Essential Components
- 3 CUPS COOKED RICE: Freshly cooked and cooled just slightly*, the base of this dish that brings everything together.
- 2 TABLESPOONS FURIKAKE: These flavor-packed little gems add a savory crunch; feel free to use more if you desire!
- WATER: Just to wet your hands and prevent the rice from sticking.
- KOSHER SALT: A sprinkle on your hands provides essential seasoning to the rice balls.
- 2 SHEETS ROASTED NORI: Cut into small strips, these lend a distinct umami flavor and crunchy texture.
- SESAME SEEDS: A delightful garnish that adds a nutty flavor.
Substitutions and Tips
Need a swap? You might consider using quinoa instead of rice for a gluten-free version—though it won’t be quite as classic in flavor. Alternatively, if you’re looking for something different, spicy tuna or pickled plums (umeboshi) can be used as fillings inside the Onigiri for an extra burst of flavor!
Also, don’t forget to experiment with the textures. Onigiri molds are a great investment if you want to make perfectly shaped rice balls that impress your guests without extra effort.
Kitchen Tools You’ll Need
- Mixing bowl (medium size)
- Rice cooker or pot (to cook the rice)
- Measuring cups (for portioning)
- Plastic wrap (for storing)
- Onigiri mold (optional, for perfect shapes)
- Sharp knife (for cutting nori)
How to Make Onigiri Japanese Rice Balls
Let’s dive into creating these delightful Onigiri Japanese Rice Balls. I’ve broken down the process into simple steps. Follow along, and you’ll have a delicious meal in no time. We’re aiming for perfectly shaped rice balls that are both flavorful and visually pleasing.
Combine and Flavor the Rice
Place the cooked rice into a mixing bowl and sprinkle on the furikake. You can use as little or as much as you’d like. Mix together gently until well combined. This blend is going to give your Onigiri its unique flavor!
Prepare Your Hands for Molding
To make the Onigiri, wet your hands in the water; this is just to keep the rice from sticking to your hands. Next, sprinkle some kosher salt onto your hands. The salt helps to flavor the Onigiri. Start with just a little, make one, and adjust as needed. This step is key because it makes each rice ball burst with flavor.
Shape the Rice into Triangles
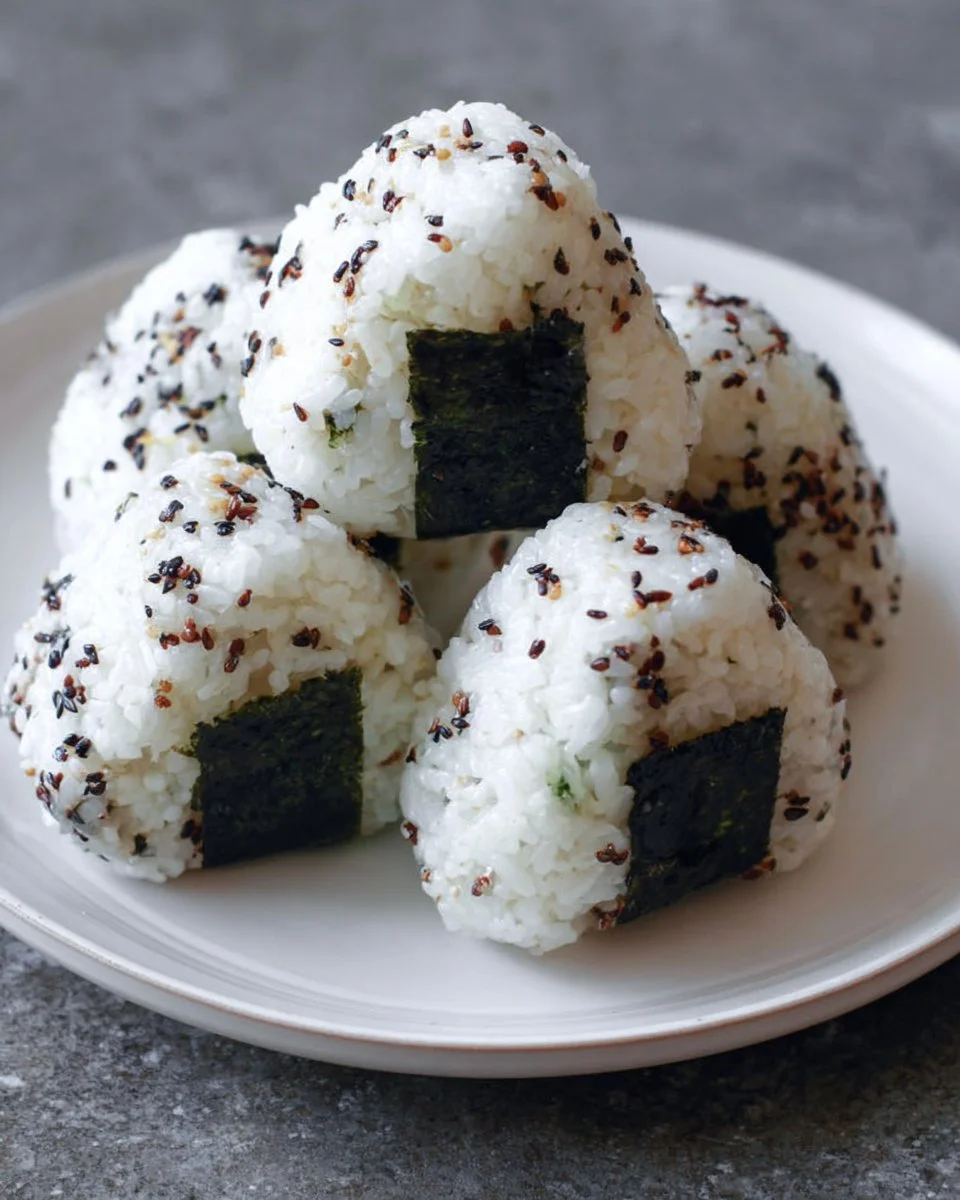
Scoop about a 1/2 cup of the cooked, warm rice (or 1/3 cup if you want smaller ones) and using both hands, form and shape the Onigiri into a triangle. Remember, don’t use too much pressure—just enough to form and shape the rice. It doesn’t have to be perfect. I also like to have a cutting board nearby and will gently press the Onigiri on the sides to help make a more distinct triangle shape.
Add the Flavorful Touches
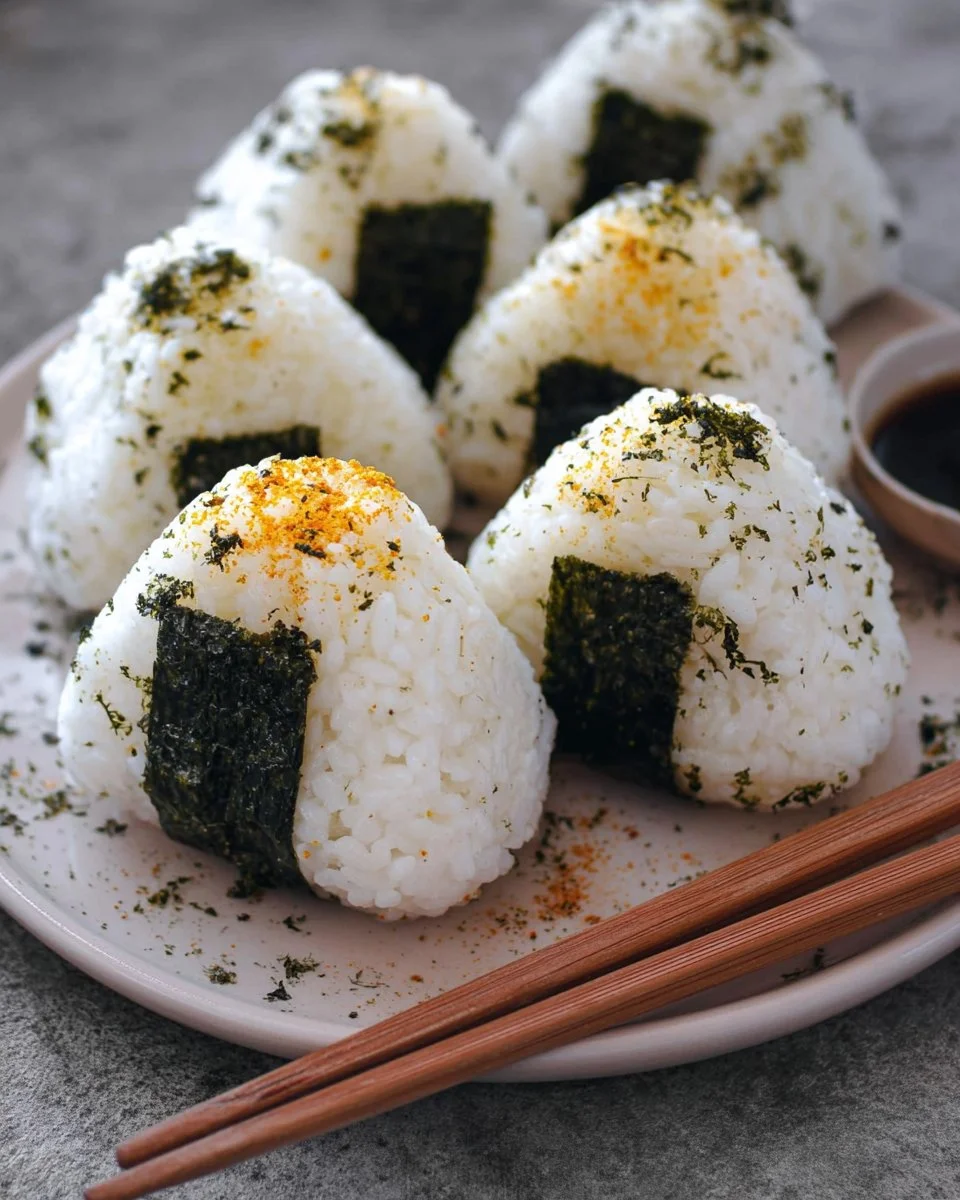
Place one piece of the nori on the bottom (as shown in the photos) and sprinkle on some sesame seeds if desired. This is when the Onigiri really starts to come together, and you’ll see the magic of texture and taste manifest!
Repeat with the Remaining Rice
Continue until all of the rice balls are complete. Don’t stress if they look a little different; that’s part of their charm! Enjoy immediately or wrap each one individually with plastic wrap.
Storing the Onigiri
Though these are best eaten fresh, you can make them in the morning and enjoy them later in the day. They keep the most flavor when consumed the same day!
How to Store Onigiri Japanese Rice Balls
If you have leftovers (which is rare but can happen), storing them is simple. At room temperature, they’ll last just a few hours, so it’s best to keep them in the refrigerator if you’re saving for later. Store in an airtight container for up to 3-4 days. In the freezer, they can last for about 2-3 months. When you’re ready to enjoy again, just thaw in the fridge overnight and enjoy at room temperature or reheat for a minute in the microwave.
Tips for Success
- Use freshly cooked rice for the best texture and flavor.
- Experiment with different fillings to customize your Onigiri.
- Don’t pack the rice too tightly; a light touch creates the best texture.
- Keep a bowl of water nearby to wet your hands frequently.
- Wrap each Onigiri with plastic wrap to maintain freshness if you’re making them ahead of time.
Serving Suggestions
- Serve with soy sauce for dipping.
- Pair with pickled vegetables for a delightful contrast.
- Garnish with extra furikake on top for added flavor.
- Include a refreshing cucumber salad using sesame dressing.
- Pair with green tea for a traditional twist.
I hope you find joy in making these beautiful Onigiri Japanese Rice Balls as much as I do! Each one feels like a hug from the inside, and I know they will become a cherished part of your culinary repertoire. Happy cooking!