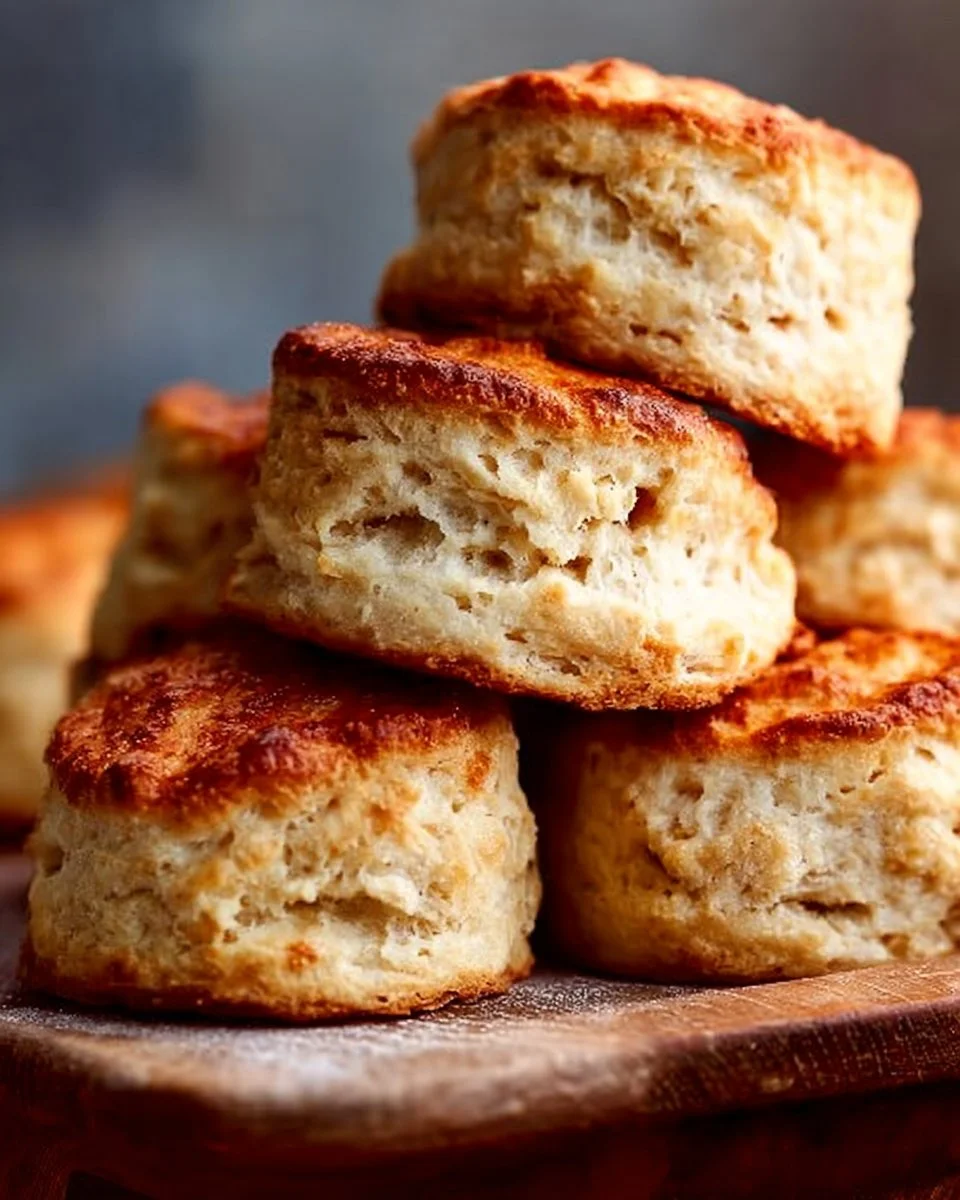
There’s something truly special about Sourdough Discard Biscuits. As they bake, the buttery aroma fills your kitchen, creating an inviting warmth that wraps around you like a cozy blanket. Tender on the inside and crisp on the outside, these biscuits are golden brown and just begging to be slathered with butter or piled high with jam. I often find myself making them on lazy Sunday mornings or whenever I have a bit of sourdough discard hanging out in my fridge, turning what could be waste into something wonderfully indulgent and satisfying.
These delightful biscuits come together surprisingly fast, which makes them perfect for busy weeknights when you want something comforting without the fuss. They shine as a side to hearty soups or stews, but are just as exquisite on their own, perhaps with a bit of honey drizzled over them. And if you happen to have leftovers (which is rare but possible!), they are fantastic cut in half and toasted for breakfast the next day—it’s all about keeping your meals exciting!
Why I Love Sourdough Discard Biscuits
Sourdough Discard Biscuits are a true winner at my table! They hit that sweet spot between ease and flavor, coming together in just minutes using basic pantry staples. The sourdough discard adds a depth of flavor that elevates them from ordinary biscuits to something truly special—these aren’t just any old biscuits; they’re light, flaky, and downright irresistible. Each bite is a harmonious blend of buttery goodness and tangy satisfaction, making them versatile enough to be enjoyed at breakfast or dinner!
Sourdough Discard Biscuits Ingredients
The magic of this recipe truly lies in its simplicity, harnessing the powerful flavor of leftover ingredients. Don’t worry about exact measurements just yet; those are all in the recipe card for you!
Essential Components
- 2 ¼ cups (270 grams) ALL-PURPOSE FLOUR: The backbone of any biscuit, providing structure and lift.
- 2 tablespoons ALUMINUM-FREE BAKING POWDER: These little gems pack a mighty punch to help your biscuits rise beautifully.
- 1 teaspoon KOSHER SALT: A key player that enhances flavors and balances the sweetness.
- ½ cup (1 stick or 113 grams) UNSALTED BUTTER (very cold, cubed): This is where we’ll get that desirable flaky texture; cold butter is essential!
- ¾ cup + 2 tablespoons BUTTERMILK (cold, divided): This brings moisture and a tang that complements the sourdough perfectly.
- ½ cup (113 grams) SOURDOUGH STARTER DISCARD: The star of the show that prevents waste and adds a delightful complexity.
- 1 tablespoon HONEY: A touch of sweetness that rounds everything out.
Substitutions and Tips
Need a swap? Here are a few ideas:
- Substitute buttermilk with regular milk and a splash of vinegar (though it won’t be quite as rich).
- For an alternative to honey, agave syrup or maple syrup works beautifully and brings its own unique flavor.
- If you’re out of baking powder, you can replace it with 1 teaspoon of baking soda mixed with 1 tablespoon of vinegar.
When making these biscuits, remember that the dough should be gently mixed. Overworking can lead to tough biscuits! Also, if you don’t have a biscuit cutter, you can always use a glass or even cut them into squares—whatever works best for you!
Kitchen Tools You’ll Need
- Large mixing bowl
- Whisk
- Pastry cutter (or your fingertips)
- Biscuit cutter (or a glass)
- Clean surface for rolling out dough
- Cast iron skillet (or baking sheet)
- Parchment paper
How to Make Sourdough Discard Biscuits
Let’s dive into creating these fluffy Sourdough Discard Biscuits. I’ve broken down the process into simple steps. Follow along, and you’ll have a delicious batch in no time. We’re aiming for flaky, tender biscuits that will have you coming back for seconds!
Preheat the Oven & Prep
First, preheat your oven to 425℉. This step is key to achieving that perfect rise and golden color!
Mix Dry Ingredients
In a large mixing bowl, whisk together the ALL-PURPOSE FLOUR, BAKING POWDER, and KOSHER SALT. This combination forms the foundation of your biscuits and ensures even distribution of the baking powder.
Cut in the Cold Butter
Next, add the COLD, CUBED BUTTER to the dry ingredients. Use your fingertips to gently pinch and spread the butter into thin sheets, or grab a pastry cutter. You want a crumbly mixture that still holds together when pressed.
Combine Wet Ingredients
Now, in a small bowl, whisk together ¾ cup BUTTERMILK, SOURDOUGH DISCARD, and HONEY until they’re well combined. Once that’s done, make a well in the center of your dry ingredients and pour in the wet mixture.
Form the Dough
Gently fold the ingredients together until they just start to form a dough. This is where you want to be careful not to overwork it; it’s okay if the dough looks a bit shaggy.
Shape Your Biscuits
Dump the dough out onto a clean, lightly-floured work surface. Since the dough will be sticky, use enough flour to prevent sticking. Bring the dough together into a mound using your hands, then flatten it into a rectangle about ¾-inch thick.
Fold for Flakiness
Now comes the fun part! Fold one side of the rectangle into the center, then do the same with the other side. Turn the dough horizontally and flatten it again. Repeat this folding process three times total before flattening it into the final ¾-inch thick rectangle for cutting.
Cut and Arrange
Take a 2 ½-inch circular biscuit cutter or a glass and cut the dough into biscuits by pressing straight down without twisting. Twisting the cutter can seal those edges and reduce your biscuits’ rising potential! Gather the scraps and form them into a rectangle, continuing to cut until all the dough is used. This should yield around 12 biscuits.
Bake to Perfection
Arrange the biscuits in a 10-inch cast iron skillet or close together on a baking sheet lined with parchment paper, making sure they touch. Brush the tops with your remaining BUTTERMILK for that lovely color. Bake in the preheated oven for 18-20 minutes or until the tops turn golden brown. Once baked, remove from the oven and serve warm—enjoy the heavenly aroma!
How to Store Sourdough Discard Biscuits
These biscuits are best enjoyed fresh, but if you have leftovers (lucky you!), keep them in an airtight container at room temperature for about a day. If you need to store them longer, pop them in the fridge for up to 4 days. You can even freeze them for 2-3 months—just thaw them in the fridge overnight before reheating! To warm up, toss them back in a low oven for a few minutes until they’re nice and toasty.
Tips for Success
- Use cold ingredients for the best rise and flaky texture.
- Don’t overmix the dough; it should come together gently.
- Make sure your biscuit cutter is sharp—this helps them rise better.
- Keep the biscuits touching on the baking tray for extra support as they puff up.
- Feel free to experiment! Add herbs or cheese for a different flavor profile.
Serving Suggestions
- Serve warm with a pat of butter and a drizzle of honey.
- Pair with a hearty soup or chili for a comforting meal.
- Perfect as a base for a breakfast sandwich with eggs and bacon!
- Enjoy with a side of fresh fruit for a delightful brunch.
- A cup of your favorite tea or coffee makes for a cozy accompaniment!
You’ll see how easy it is to fall in love with these beautiful biscuits. Happy baking!